Repairing your Cracked Plastic
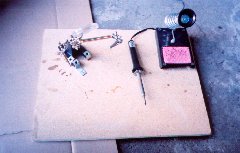
| Items Needed: | 1. Soldering Iron with replaceable tips (25w range, 45-degree cone) |
| 2. ABS plastic (can be found at hobby store) | |
| 3. A small fan to push plastic fumes away and a well ventilated area | |
| 4. Utility knife | |
Estimates: |
Time: Depends on size and amount. Cost: ~$10 - $90 USD for soldering iron. ~$5 - $30 USD for the ABS |
You need to remove all wax, grease, and other junk from the area you are repairing.
The strips of ABS will act as solder later.
If the pieces are separated or not, be sure to line them up correctly. Once the Iron is warmed up, spot weld the center, the two ends, and about every inch along the crack. Allow each spot to cool for 3-5 seconds.
If working on an open-ended crack, start at the open so that the crack is not spread as you go.

Once the piece has been spot welded together, using the tip of the iron, cut a deep V-groove along the seam. Go about 2/3 of the way through the plastic.
(If you don't want to repaint, go almost all the way through from the back only. Do only a few inches at a time.)
Go back to the start of the groove and feed the strips of ABS into the iron, melting it into the groove while also slightly melting the sides of the groove. Use the iron to paddle the filler and work it into the groove as you go, working it so that the melted filler mixes with the melted groove sides. Make sure that you apply enough heat so that the zone of melting extends both all the way to the bottom of your V-groove, and slightly into the plastic on either side, so that you get a strong joint. Fill the weld slightly proud of the surface; you can always file it down flush later if you need to, and you'll probably end up with some slaggy scruff on the surface anyway. Allow 5 to 10 minutes for cooling when completed.
Clean off loose slag and test for strength (within reason).
If you need to clean-up the weld, use a file and file down the area, clearing the plastic from the file frequently.
Practice first!
If you need to paint, see the painting instructions.
Be patient and don't rush it.
If the piece you're working on will not be visible (or if you want maximum strength and don't mind doing a little spot repainting) go back over the seam again from the other side, going deep enough to melt into the melt zone from your first pass.